
 Data Recovery
Best App to Recover Files after Emptying Bin


I recently deleted a video footage for my YouTube channel, and emptied my recycle bin on my PC by accident. I've been trying different apps for hours, they gave the same result and not recovered! Until I used Cisdem app, it scanned my HDD and showed all the recoverable files that I needed. - Eric | YouTuber
Eric, who has his own YouTube channel of 20,000 + subscribers, creates a lot technical how-to videos on his Mac very often.
Challenge of restoring a trashed video
Eric accidentally emptied his recycle bin and all the videos in it were cleared. When the bin is emptied, Windows will mark the space by the trashed files as “available” to store new data. Though the deleted video won’t be overwritten immediately, as time goes by, the chance of being overwritten grows and the video might be gone forever.
In addition, a video file is often large, scattered across different spaces on a drive. If any of the crucial space have been overwritten by new data, the video will be corrupted and won’t be opened at all. How could Eric recover a permanently deleted video without corruption?
Solution: Using Cisdem Data Recovery
Eric downloaded 2 well-known freeware recovery programs, and one popular tool mentioned on tech forums very often. After a long deep scan, all the tools returned a list of thousands of files, but most of them were just system files, and the previews were broken thumbnails, until he found Cisdem Data Recovery from CNET. It gave Eric a successful and good video recovery experience.
Eric wants to share his experience with others that permanently deleted their videos or other files from recycle bin on PC. Below are the steps that he followed, organized by Cisdem.
Steps to recover a video after emptying recycle bin on Windows
Step 1. Install and run the app.
I downloaded the program from Cisdem’s official website. Double clicked the .exe file to install the program quickly. Then ran the program on my PC.
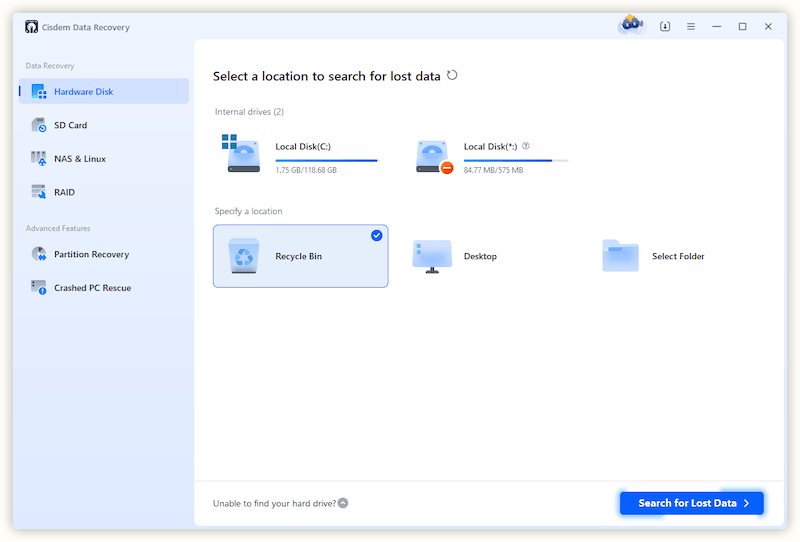
Step 2. Select recycle bin to scan.
I selected Recycle Bin and clicked Search for Lost Data to start the scanning.
Step 3. Check the trashed video file.
The scan was done quickly, all the recoverable videos from recycle bin were listed in Type > Videos. I could quickly locate the videos because I basically emptied my bin on a regular basis, so there wouldn’t be too many videos in the bin.
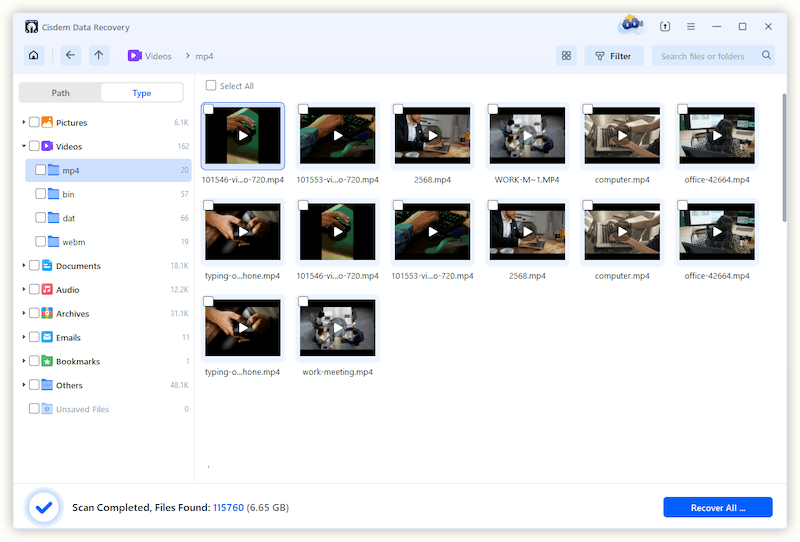
Then I clicked the play button on the thumbnail to preview my video.

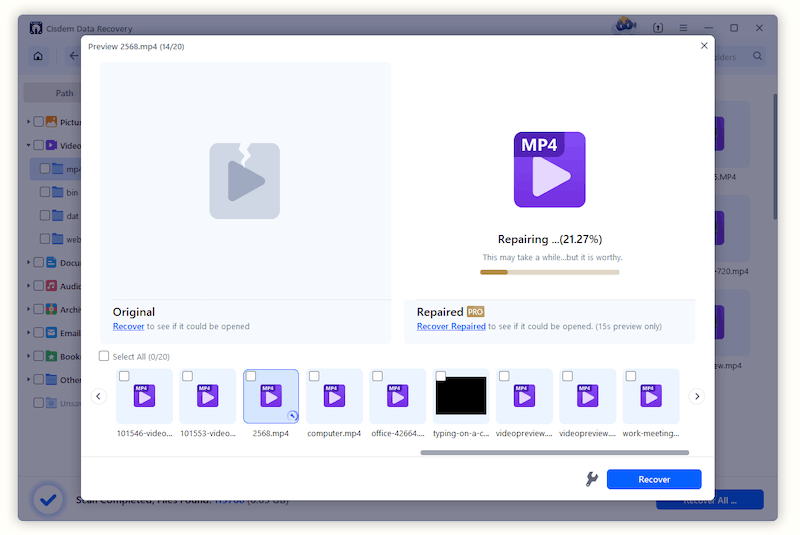
Tips from Cisdem:
If you cannot preview a video, it may be corrupted. You can click on the File Repair icon at the bottom of Preview windows to fix the damaged video.
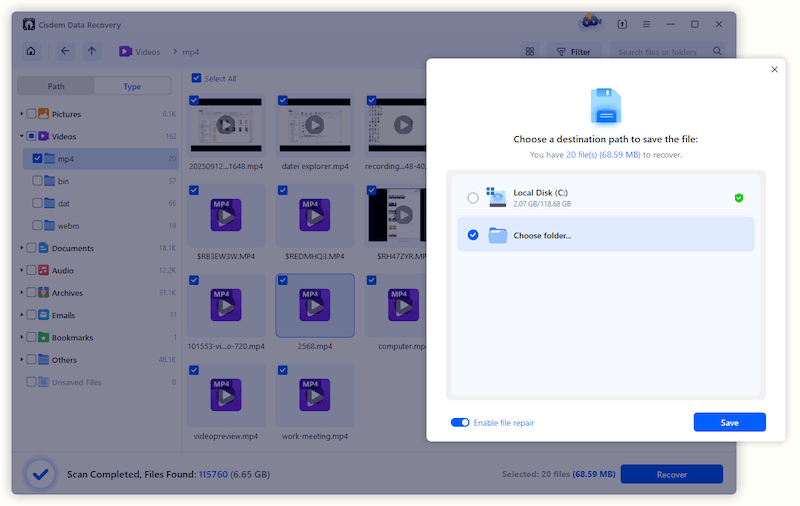
Step 4. Select videos to recover.
By checking the box before the videos, I was able to recover the file to my local drive on my PC.
FAQ
Virtually all mainstream video formats: AVI, MOV, MP4, M4V, 3GP, 3G2, WMV, ASF, FLV, SWF, MPG(MPEG), RM(RMVB), MKV, MXF, etc.
This is a common issue with large videos. It might be for the reason that some parts of the video are overwritten or damaged after deletion. Cisdem Data Recovery found most of the fragments, but it was not intact. Use the File Repair tool in Cisdem to fix the issue.
When you empty the trash Bin, the original file name that stored in the file system's directory, is also deleted. In most cases, Cisdem Data Recovery can recover a video with its original name, but in some cases, Cisdem Data Recovery can only recover a video based on its content, and not knowing its original name, so it assigns a generic one.
Loved the article, share!