

External Hard Drive Not Mounting on Mac? Force Mount or Fix!
 23.7K
23.7K
 4
4


You plug an external hard drive into your Mac, but find it not showing up on the Desktop, in Finder or Disk Utility app. Seriously, your Mac is likely unable to mount the external hard drive. Mounting is the process by which a computer’s operating system makes files and directories on a storage device available and accessible. If a drive is unmountable, the Mac won’t be able to recognize it and let you access to its data.
Don't worry, this post will guide you on how to fix “External hard drive not mounting on Mac”, from connectivity issues to technical problems errors, and help you resuce the data even when you cannot access the files anymore.
Key Takeaways
- There are many reasons leading to "external hard drive not mounting on Mac", including poor connectivity, disabled display settings, incompatible file system of the storage device, damaged drive, OS/Mac issues, conflicts with other hardware/software.
- We can force mount an external hard drive on Mac via Disk Utility or Terminal. Forcing mounting won't cause data loss, but you are recommended to back up your important files first via Time Machine or to a safe place/cloud storage.
- If you want to force mount an internal hard drive on Mac, use FSCK command.
- When force mounting not working, there are 10 fixes to mount a hard drive on your Mac. This includes: relaunch Finder, check macOS drive display settings, perform First Aid, repair drive on Windows PC, boot Mac in recovery mode, Kill fsck, reset Mac firmware settings, update macOS, mount drive on Windows, format external drive and recover data with a professional data recovery program.
 Cisdem Data Recovery for Mac
Quickly Access Data from Unmounted External Drive on Mac
- Recover all the files that are stored on the unmountable hard drive
- Support various file types: video, photo, document, audio, email, bookmark, etc.
- Also recover data lost due to different reasons: deletion, formatting, system crash, partition loss, virus attack, etc.
- Restore files from both internal and external storage devices, performing equally well
- Repair corrupted videos, photos and documents
- Recover iCloud files
- Locate wanted files efficiently with filter tools and search box
- Preview files before actual recovery
- Recover data to local drive or Cloud
- Create disk backup and bootable macOS installer
 Free Download macOS 10.15 or later
Why Won't My External Hard Drive Mount on My Mac?
To gain a deeper understanding of the issue, you’d better know the major reasons why external hard disk can’t be properly mounted on Mac. Here as they are grouped:
- Poor connectivity
Foreign matters like dust may stay on the USB connectors and ports between your external hard drive and Mac, resulting in a dirty and loose connection, which hinders your drive from being detected by Mac. For another, there is a chance that the USB connecting cable has been broken. - Disabled display settings
External hard disk connected to your Mac can be just hidden rather than unmounted because of your wrong settings. The drive will show up again if you simply enable the display settings on Mac. - Incompatible file system of the storage device
It is possible that the file system format of your external hard drive is not supported by Mac, so Mac can’t recognize it successfully. This is one reason that people usually ignore. - Damaged drive
Due to firmware faults, power surge, overheating, mechanical failure or logical error, the whole external hard drive or a particular partition might be corrupted. A damaged hard drive won’t be mounted successfully. - OS/Mac issues
Poor Mac performance causes the issue too. Your Mac may fail to allocate resources to mount a drive, or load the drive when it runs some disk-intensive tasks, such as indexing, backing up, app installing, etc. And the issue can be caused by the glitch in a macOS version, or the macOS is in a checking process and temporarily stop the mounting. - Conflicts with other hardware/software
Third party software like antivirus app may block drives that it takes as suspicious. Or there are multiple devices or drivers running in conflict.
How to Force Mount External Hard Drive on Mac?
If you have checked the connection to be fine and also have rebooted your Mac, but your Mac still fails to mount the external hard drive, it indicates that there are other factors resulting in the unmounting issue. Before digging out any ways to repair your unmounted disk, firstly you are suggested to try to force mount it on your Mac for sake of efficiency.
Will Force Mount Cause Data Loss?
Generally, force mounting a drive on Mac won’t cause data loss. But if the mounting failure is caused by corruption or you are trying to fix the issue with Force commands in Terminal, it is possible.
Therefore, to keep your data safe, you are recommended to extract the data first before force mounting. And you can feel relieved because Cisdem Data Recovery helps recover and save all the files from your disk.
Method 1: Force Mount External Hard Drive on Mac with Disk Utility
Disk Utility contains a "Mount" option that can be used to manually force mount an external hard drive. But this method is feasible only when your unmounted drive shows up in Disk Utility.
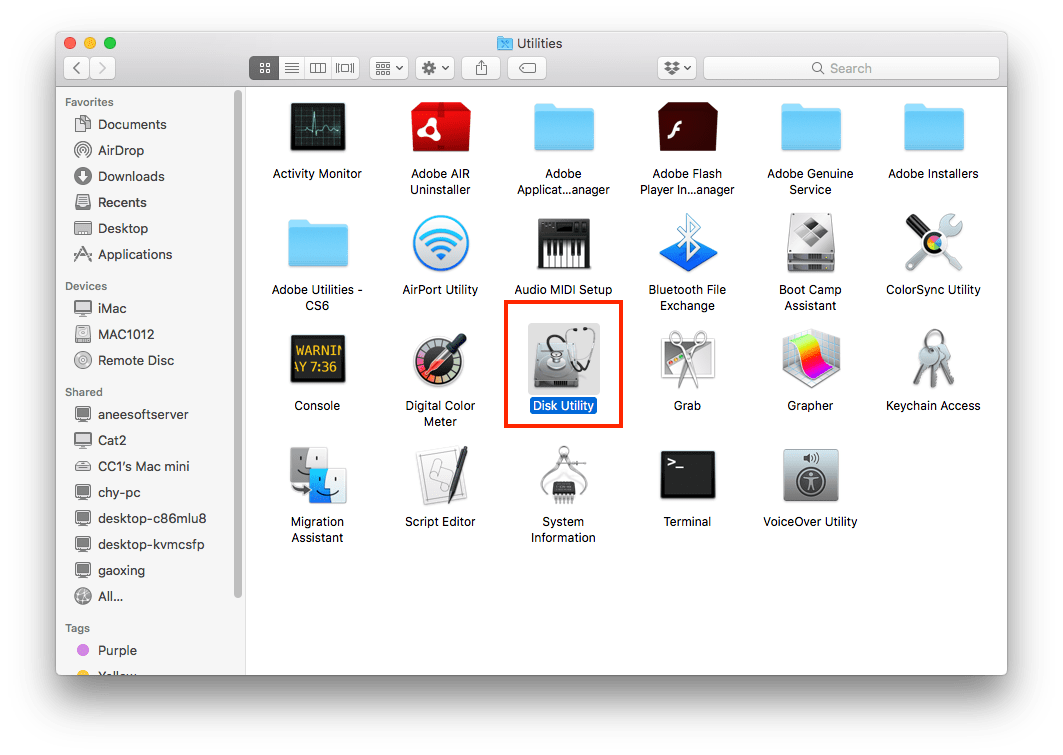
- Go to Finder > Applications > Utilities > Disk Utility.
![force mount disk utility 01]()
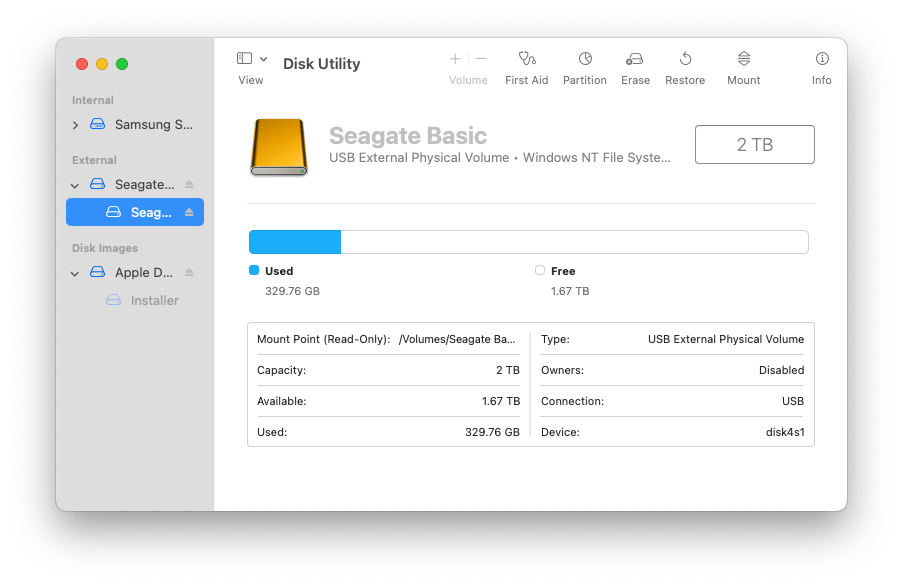
- Choose the external drive that is not mounted, expand its partitions or volumes, click on "Mount" button at the top center. After the mounting process, your drive will show up on desktop or Finder.
![force mount disk utility 02]()
Method 2: Force Mount External Hard Disk on Mac with Terminal
If Disk Utility Mount not working, several specific Terminal command lines are capable of removing files which blocks your external hard drive from mounting normally. While the pity is that Terminal doesn’t work for undetected disks in all cases. Anyway, you can have a try by following the instruction in details.
- Connect the unmounted drive to your Mac.
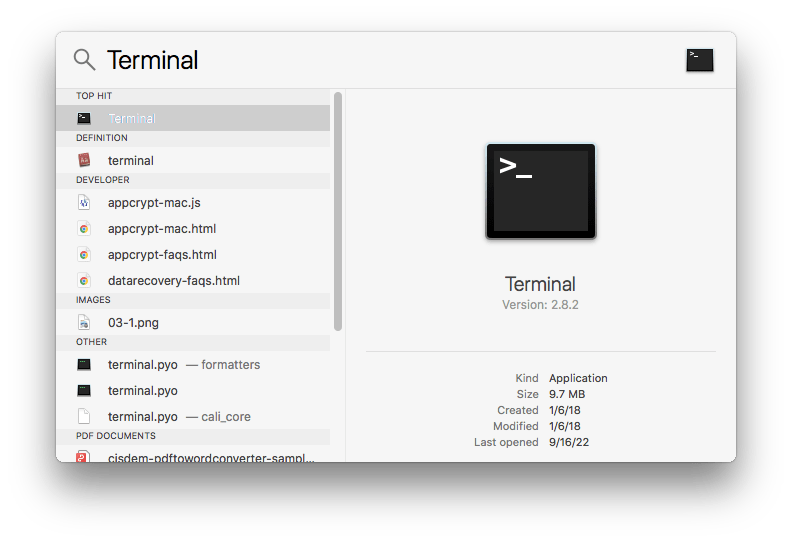
- Launch "Terminal" by using Spotlight Search.
![force mount terminal 01]()
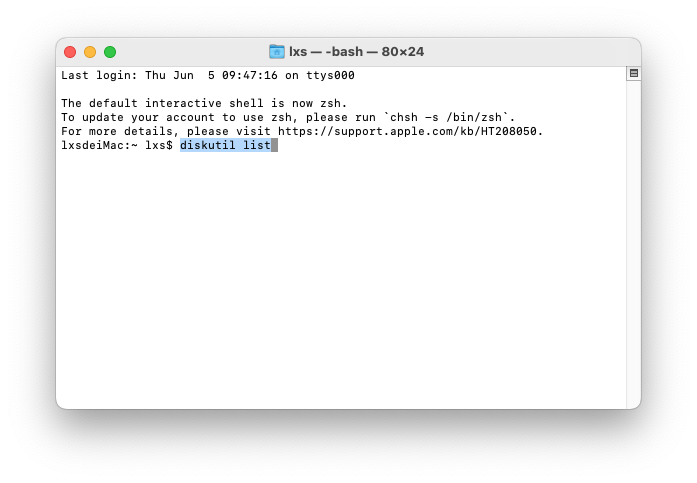
- Type the command line: diskutil list, press Enter.
![mount with terminal 01]()
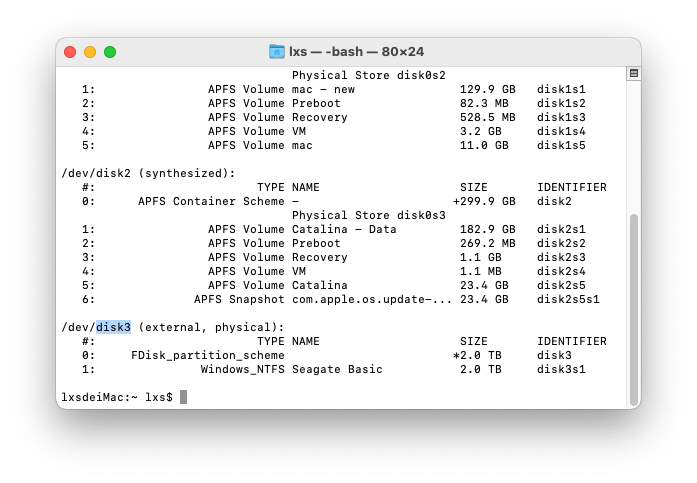
- You can view the list of all devices. Find out the BSD name and file system of the external drive that is not mounting.
![mount with terminal 02]()
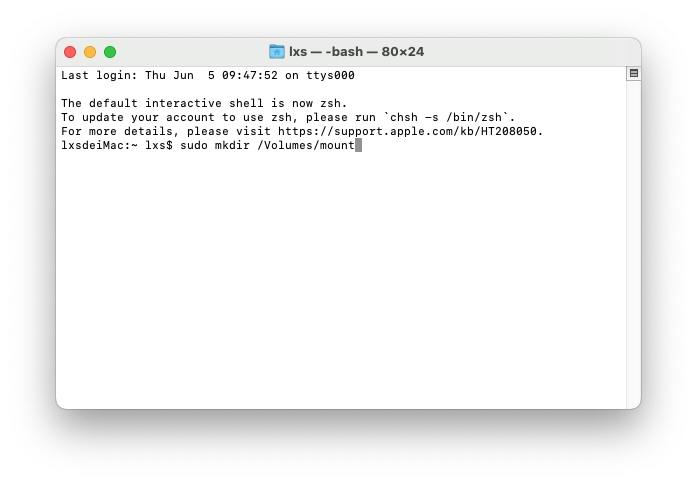
- Type the command line: sudo mkdir /Volumes/mount to create a mount point.
![mount with terminal 03]()
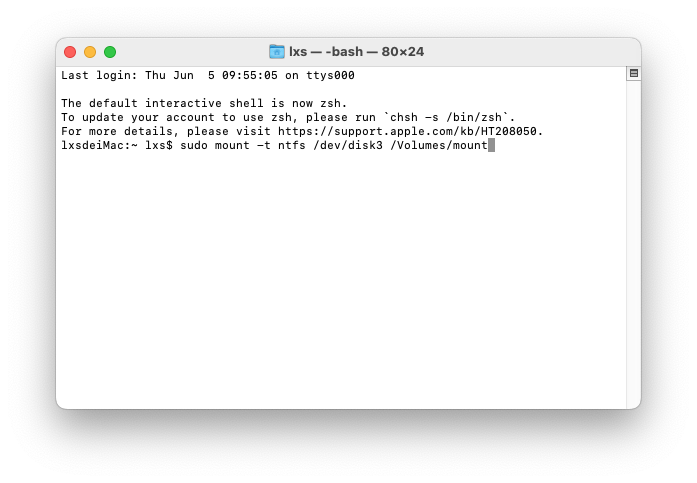
- Continue to type: sudo mount -t [file system] /dev/disk[disk number] /Volumes/mount into the window and execute it. For example in my case, the exact command line should be sudo mount -t ntfs /dev/disk3 /Volumes/mount.
![mount with terminal 04]()
- Press Enter and check if you can get the external hard disk to show up on Mac desktop or in the Finder.
Bonus Tip: Force Mount Internal Hard Disk on Mac with FSCK
Likewise, internal hard drive not mounting on Mac happens as well. Then it’s recommended to run FSCK command to force mount the Macintosh HD. FSCK stands for File System Consistency Check, a command-line tool which reveals and fixes the underlined structure of macOS hard disk.
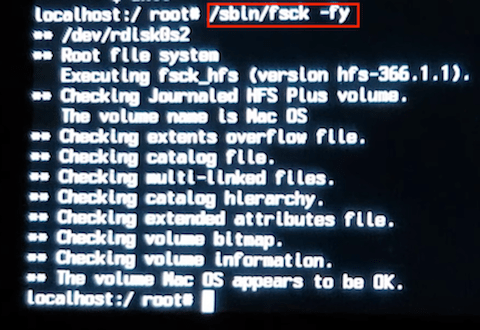
- Restart your Mac, hold down Command+S until the Apple logo appears. This will boot Mac into Single User Mode.
- Type /sbin/fsck -fy and press Enter.
- When it shows the message “File system was modified”, retype the above command until you see "The volume [name] appears to be OK".
![force mount with fsck]()
- Type reboot to restart your Mac.
- After rebooting, verify if the errors have been fixed and the macOS disk has been mounted successfully.
Still Not Mounting? Alternative Fixes for External Hard Drive Not Mounting on Mac?
Still fail to force mount your external hard drive on Mac? Proceed to fix it with safety. This part will deliver 10 ways to fix an external hard drive not mounting on Mac.
1. Relaunch Finder
Restarting Finder is an attempt easy to carry out when your drive doesn’t appear on Finder or desktop. Here’s the guide.
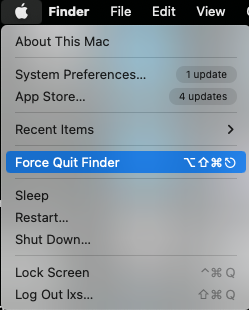
- Click on Apple icon from menubar, and go to Force Quit.
![force quit]()
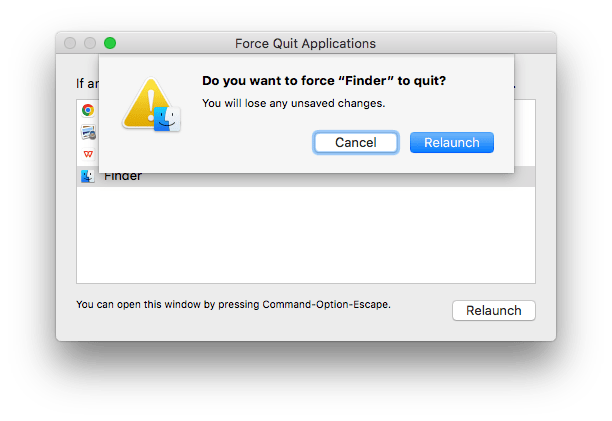
- Choose Finder, click "Relaunch" button.
- Select "Relaunch" to confirm the restarting.
![fix relaunch finder 03]()
2. Check macOS Drive Display Settings
This is another easy fix also involving Mac Finder. At times your external hard drive could not be mounted smoothly because its display on desktop or Finder has been disabled yet. Let’s see the steps below to solve it.
- Open Finder from the dock.
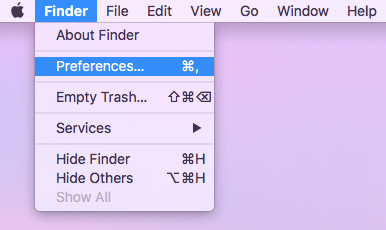
- Click Finder on the Apple menu bar, select "Preferences" from the drop-down menu.
![fix drive display 01]()
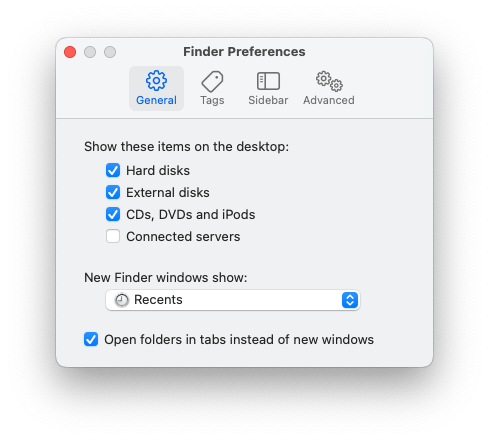
- Choose "General" tab, check the box next to "External disks".
![fix drive display 02]()
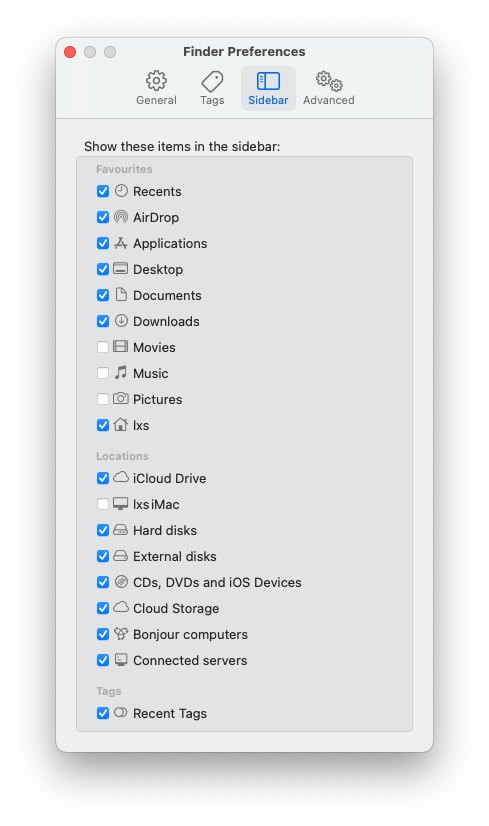
- Next click "Sidebar" tab, check the box beside "External disks" under "Locations" section.
![fix drive display 03]()
3. Perform First Aid in Disk Utility
An external hard drive with internal errors can also make it inaccessible to your Mac. One handy storage device repair feature called First Aid can be used to fix an unmounted hard drive on Mac machine. This feature can check the drive for errors and then repair it if necessary. The following is how to access First Aid.
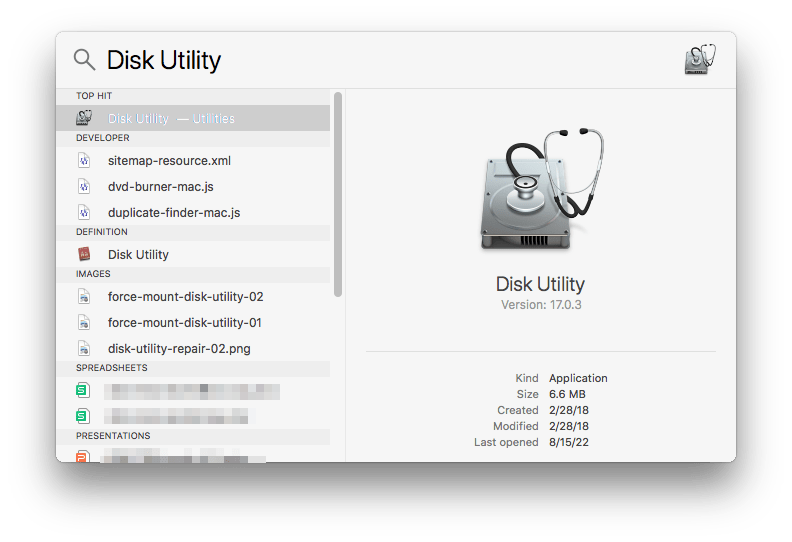
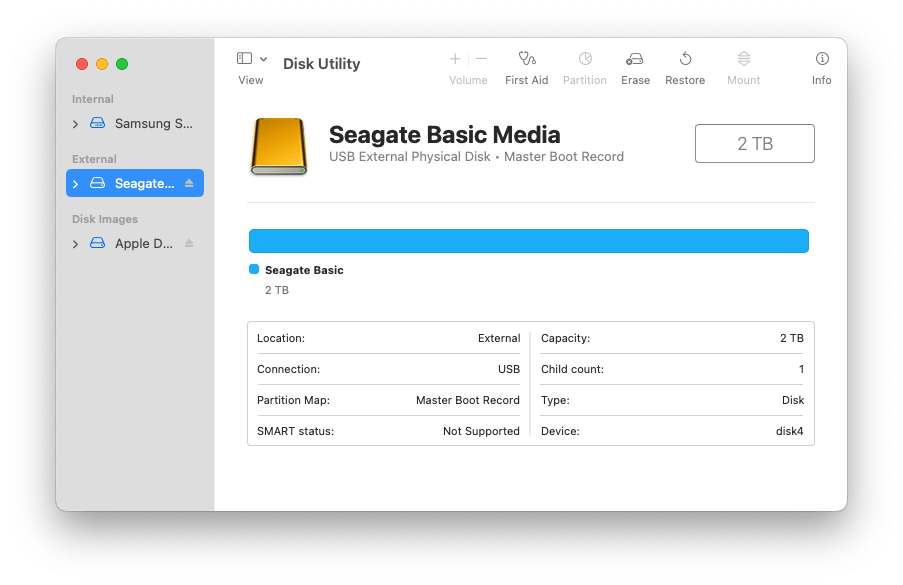
- Search for Disk Utility using Spotlight, press Enter to launch it.
![open disk utility]()
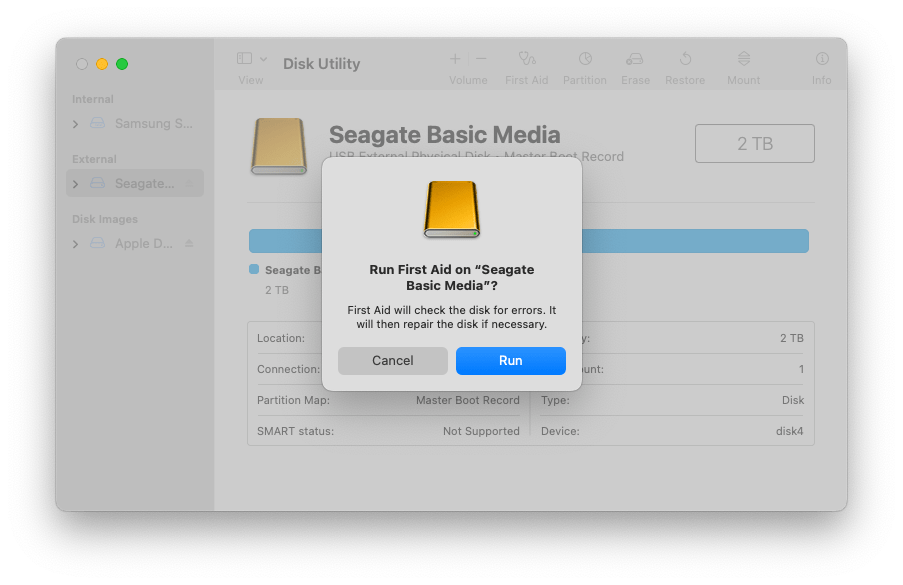
- Select your external hard drive from the list of storage devices on the left sidebar. Click "First Aid" from the top tool menu.
![first aid 01]()
- Click "Run" button to initiate the repairing.
![first aid 02]()
- Once the fixing process done, eject your external hard drive in a safe manner and reboot your Mac. Then reconnect the drive with Mac to see whether Mac can mount it properly.

4. Repair Drive on a Windows PC
If you fail to repair and mount your external disk on a Mac device, or your external hard drive is in a Windows file system format, such as NTFS or exFAT, switch to a Windows PC and repair before plugging to your Mac again.
- Connect the external hard drive to Windows PC.
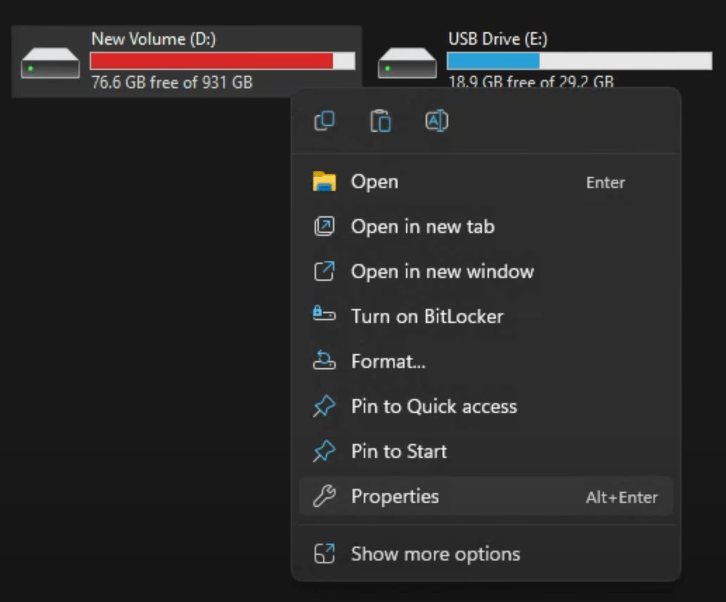
- Right click on the drive and choose Properties.
![repair drive win 01]()
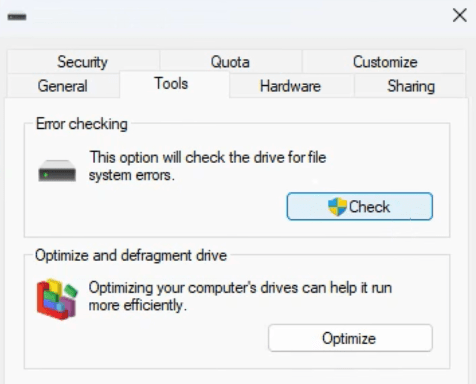
- Go to Tools > Check.
![repair drive win 02]()
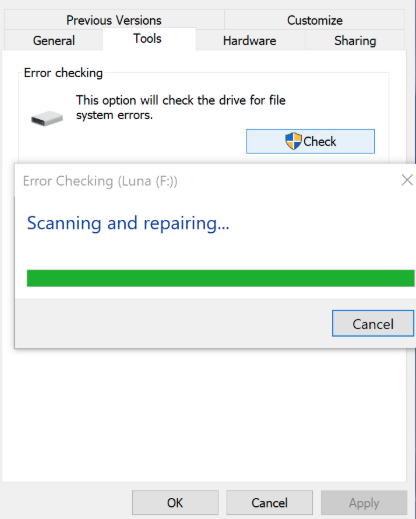
- Click "Scan and Repair Drive" to start the scanning and repairing.
![repair drive win 03]()
- Then eject the hard drive, connect the repaired hard drive to your Mac to check if can be mounted or not.
5. Boot in Recovery Mode
macOS Recovery Mode loads essential utilities and helps users repairs or restore macOS when there is startup or disk issues. So, if your Mac behaves weird or disk won’t mount, you can try booting in the Recovery Mode, then use the Disk Utility tool to fix the drive again.
For Intel-based Macs
- Press and release the power button to turn on your Mac, then immediately press and hold Command (⌘) + R, until you see an Apple logo.
- Log in to your Mac. Connect the drive to your Mac.
- You will see a window with utilities, choose Disk Utility and run First Aid on the unmounted drive.
- Restart your Mac and check if the drive mounts or not.
For Apple Silicon Macs
- Press and hold the power button until you see the “Loading startup options” window.
- Click Options > Continue.
- Connect the drive to your Mac.
- You will see a window with utilities, choose Disk Utility and run First Aid on the unmounted drive.
- Restart your Mac and check if it works or not.
6. Kill fsck
The fsck process can be also a reason to prevent your hard drive from mounting, because it may block the drive connection to ensure data integrity when it detects file system errors on your Mac. So, you should kill this checking process.
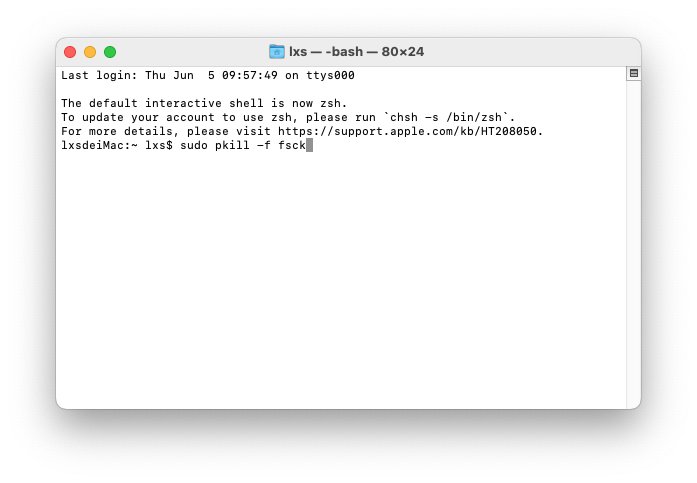
- Open Terminal on your Mac.
- Type sudo pkill -f fsck and press Enter.
![kill fsck]()
- Then connect the drive to your Mac and check if it mounts.
7. Reset Mac Firmware Settings
Firmware involves the function of your Mac and other hardwares. An external hard disk not mounted might be caused by improper firmware settings as well. This is how to do the resetting. Don’t forget to unplug the external disk from your Mac previously.
How to Reset SMC?
For a desktop Mac:
- Disconnect the power cable of Mac.
- Re-plug the cable after around 15 seconds.
- Press Power button 5 seconds later to reboot the Mac.
For a laptop Mac:
- Disconnect the power cable and Mac, then reconnect them.
- Press and hold Control+Shift+Option keys & Power button simultaneously for about 10 seconds.
- Release the above mentioned keys and button.
- Restart the Mac.
How to Reset NVRAM/PRAM?
- Shut down your Mac.
- Restart it while holding Command + Option + P + R.
![reset firmware settings]()
- Release them when hearing a second startup chime or Apple logo appears and disappears again.
After the resetting, reconnect the disk when getting to Mac desktop to check if it can be mounted normally.
8. Update macOS
Your Mac running too old version will not support the file system of external hard disk, thus disabling Mac to mount an disk appropriately. We say macOS Sierra or earlier can’t be compatible with APFS file system. So try to upgrade your Mac machine with steps here.
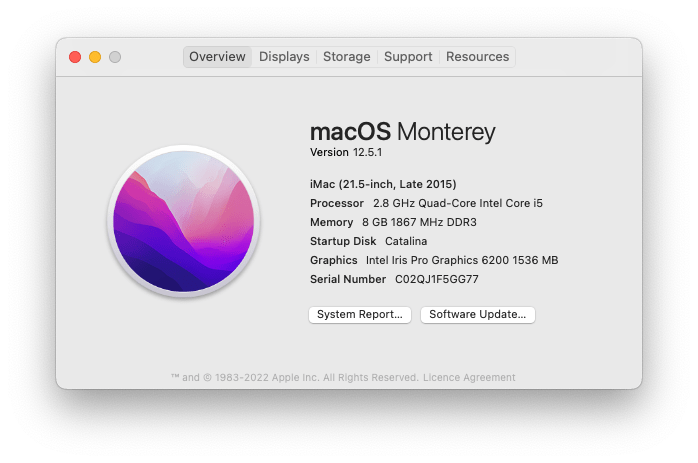
- On Mac desktop, go to Apple menu > About This Mac.
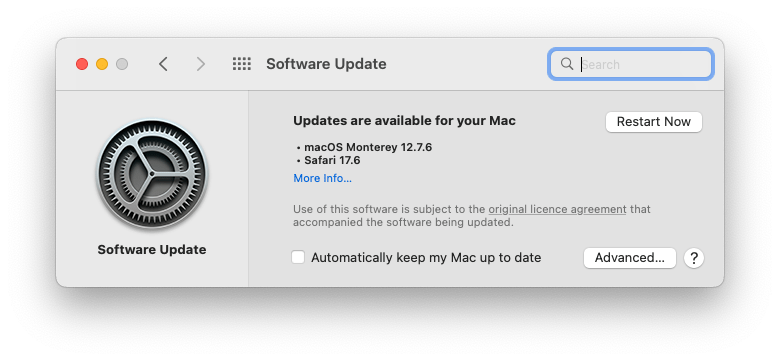
- Choose Software Update button from the pop-up window.
![update macos01]()
- Once there’re any updates available for your computer, hit on "Restart Now" to start the upgrade.
![update macos 02]()
9. Mount Drive on Windows
If you have an additional PC to work with and your external hard drive comes with APFS format, you can install an APFS drive reader for Windows to regain your access to the data on the drive, this works when file system compatibility is the reason not mounting a drive.
- Install Paragon APFS for Windows on your PC.
- Connect the not-mounting drive to your PC.
- The drive will show up, you can read the data or transfer the data to an easily accessible local/external drive.
10. Format The Unmountable External Hard Drive
Still not able to force mount the hard drive on your Mac? It may be caused by a severe file system error. Then you are recommended to format the drive and save it in a macOS-friendly format.
And don’t worry, the formatted data won’t be lost, Cisdem Data Recovery comes in handy to recover lost data under different situations, from deleting, formatting, unsaved, to corrupting. It supports 1000+ types of file recovery: video, photo, document, audio, email, bookmark, archive, etc.
- Open Disk Utility.
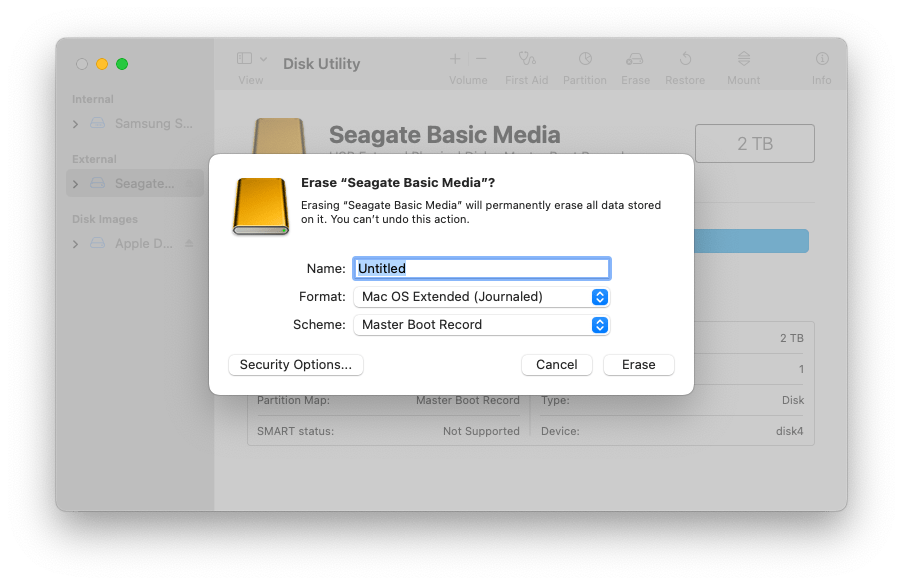
- Click on the drive and click on Erase.
![format drive mac01]()
- A dialog box will pop up. Select a format for your drive. "Mac OS Extended (Journaled)" is recommended. Also give the drive a name. Then click "Erase" button to start reformatting.
![format drive mac02]()
- Then click "Done" to complete the formatting.
- Now, install and run Cisdem Data Recovery on your Mac to rescue the data from the formatted drive.
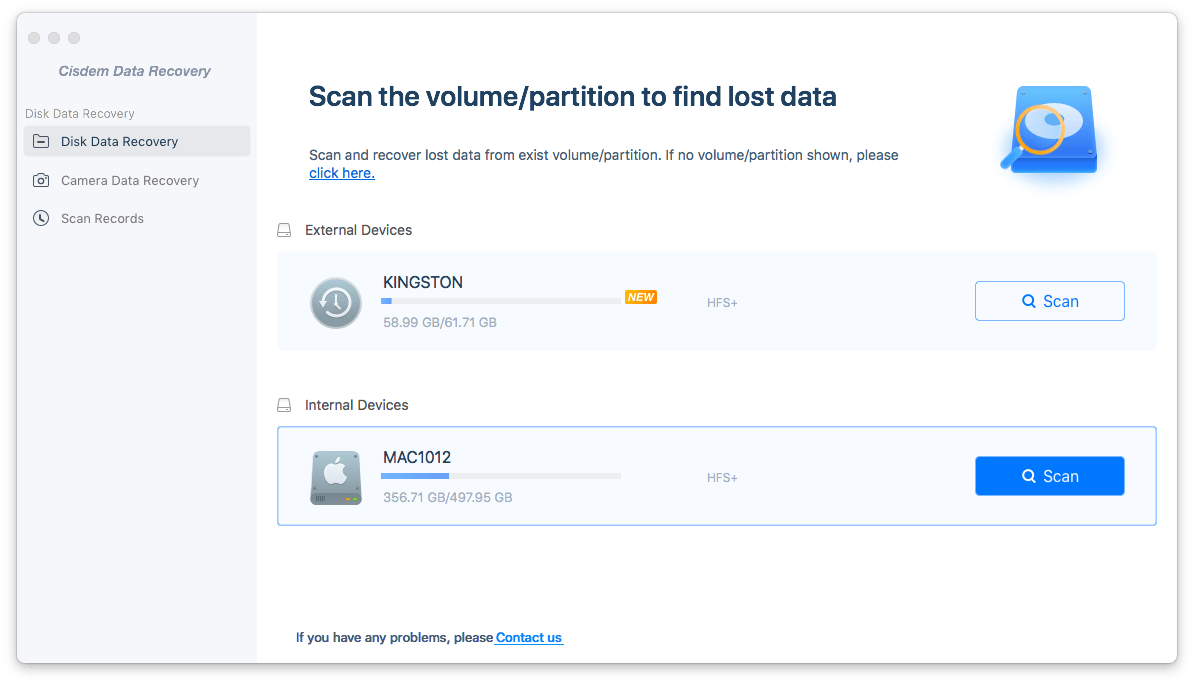
Free Download macOS 10.15 or later - Select the formatted hard drive and click on Search for Lost Data.
![cisdem data recovery 01]()
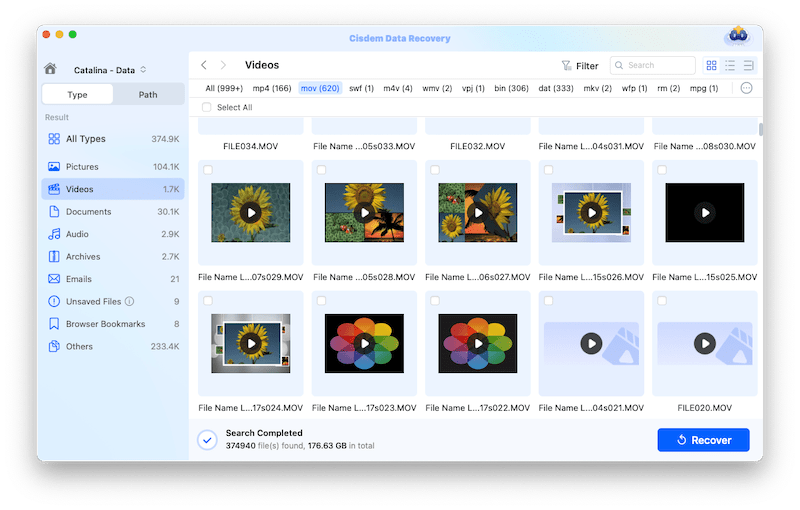
- Go to Type, browse the recoverable files in different folders.
![cisdem data recovery 02]()
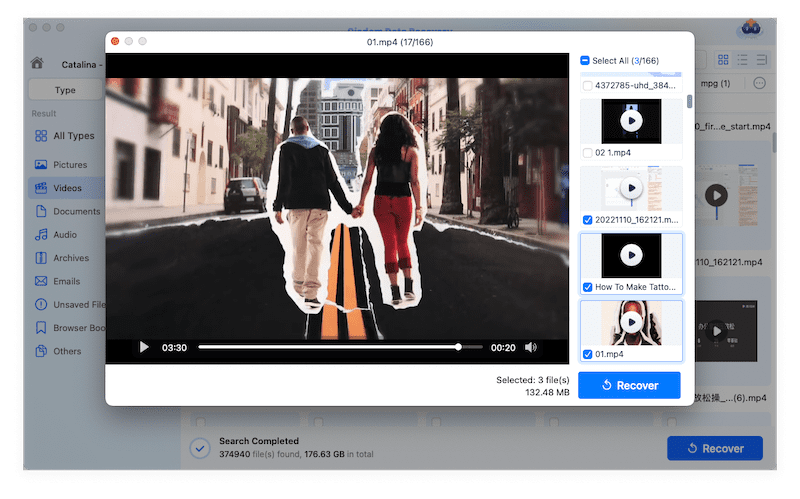
- Preview the files and select them to Recover.
![cisdem data recovery 03]()
In Closing
Mounting is a prerequisite for Mac to recognize an external hard drive. Drive not mounting on Mac is quite annoying. Luckily, force mounting is possible and there are a few fixes can be applied to cope with this issue as introduced in this post. Also, whenever you store your files, back up an additional copy of those most important files to a safe place or in the cloud.

Connie Yu has been a columnist in the field of data recovery since 2011. She studied a lot of data loss situations and tested repeatedly to find a feasible solution tailored for each case. And her solutions are always updated to fix problems from the newest systems, devices and apps.

JK Tam is the lead developer at Cisdem, bringing over two decades of hands-on experience in cross-platform software development to the editorial team. He is now the lead technical approver for all articles related to Data Recovery and DVD Burner.
Margaret R. Corona
Disk Utility’s First Aid is usually my go-to, but I didn’t realize Terminal commands could be so handy, and much easier than I expect to fix the issue. Great guide, practically useful. Thanks.
Naomi
Before force mounting an external hard drive, it's really necessary to recover our data to another drive first, by using a reliable data recovery tool. I'm so regretful that I didn't do that. Now I don't make my disk mount on Mac again successfully, neither do I regain my files in it!
Daniel
Method 1 worked for me. I was struggling to get it working. Thank you for writing this article!
Glenn Pierce
Excellent, helpful article. I was able to eject & remount my external hard drive using the Terminal function (which I hadn't known about). But it is good to know that Cisdem Data Recovery for Mac exists in case I need it.